How to Use a Force Gauge?
Sat, Jun 29 by ATO.com
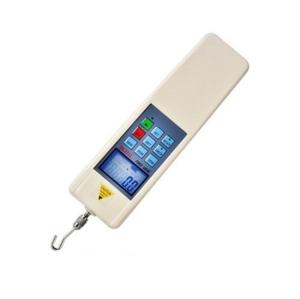
Force gauges are universal measuring instruments used in almost all industries. As the name suggests, force gauges are used to measure force in push or pull tests. Force gauges have applications in research and development, production and quality laboratory environments. There are generally two main types of force gauges: mechanical force gauge and digital force gauge. Now, ATO automation will introduce you to the detailed use of a force gauge.

How to use force gauge?
- Please check whether the power supply of the digital force gauge is sufficient before operation.
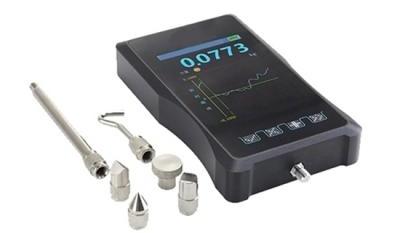
- To install the test head, please select the applicable test head accessory or fixture and install it on the test rod.
- If you cannot touch the test object after installing the clamp, you can use the included extension rod to install the clamp. When testing with an extension rod, the test object and the force gauge must be on the same straight line, otherwise the correct value will not be measured.
- Press the on/off key to switch power. After the digital force gauge self-test is completed, the instrument can enter normal working status.
- Select the appropriate test mode (load real-time value/peak hold/peak hold automatic delay), and press the "peak" key to display the word "PEAK", which is the peak hold mode. "AUTO PEAK" is the peak hold automatic delay release mode, and each time the peak key is pressed, the three modes are cycled. The "unit" key can switch the unit of the test force value (N, kg and lb). The "Setting" key can be used to set the upper and lower limit values, the minimum collection value, the automatic shutdown time, the peak value automatic release time, etc.
- Before using the force gauge, observe whether the pointer is aligned with the zero scale. Hang the spring scale on the iron frame, pull the spring scale by hand (do not pull the pointer to full scale), then release it, and observe whether the pointer returns to zero. If not, calibrate the pointer to zero (or note which scale the pointer is facing at this time).
- During testing, read the value when the object to be measured and the force gauge are in a straight line.
- You can measure several more times, take the average and record the value to the corresponding location.
- After the test is completed, remove the force gauge and it's probe and place them back in the box.
How to calibrate force gauge?
- Preparation work: Ensure that the calibration equipment and materials are prepared, including load cells for calibration, calibration tools (such as calibration plates), calibration hooks, calibration standards, etc.
- Calibrate the load sensor: Connect the load sensor for calibration to the force gauge, and hang the load sensor on a fixed bracket. This holder can be a calibration disk or a calibration hook.
- Apply standard load: Apply standard load on the load cell. Standard loads should be calibrated and traceable loads.
- Calibration operation: Carry out calibration operation according to the operating instructions of the equipment. Calibration operations generally include adjusting the zero point (removing the zero drift of the sensor), adjusting the sensitivity (adjusting the sensitivity of the sensor to match the standard load), etc.
- Measurement and comparison: After the calibration is completed, use the force gauge to conduct actual measurement and compare it with the calibrated standard load to ensure that the measurement results are consistent with the value of the standard load.
- Record calibration data: Record the data before calibration, after calibration and actual measurement, including calibration load value, sensor output value and actual measurement value of force gauge.
- Analyze the calibration results: Analyze the calibration results based on the recorded data. If you find that your force gauge measurements differ significantly from the standard, the equipment may need to be recalibrated or adjusted.


