How to Use a Digital Counter for Counting?
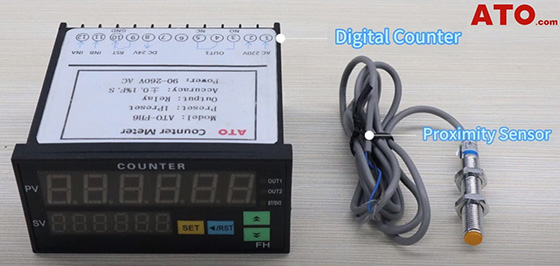
In this article, we will guide you through the setup and operation of digital counter, along with a proximity switch or sensor, both essential components available at ATO online store. The proximity switch detects object presence or absence and sends signals to the counter, incrementing the count accordingly.

Digital Counter Overview
Digital counter we use is a high-precision preset device featuring relay output with an impressive accuracy of ±0.1% Full Scale. It operates efficiently within a broad power range of 90-260V AC. The counter is equipped with dual large 6-digit LED display screens, providing clear visibility of both present and set values. Its user-friendly interface includes a yellow SET button, a blue RST/SHIFT button, and two green navigation buttons, ensuring easy setup and configuration.
Wiring Process
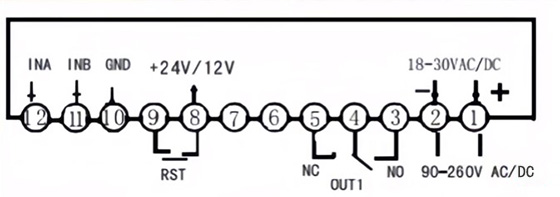
To begin setup, identify the terminals on the digital counter and refer to the provided schematic. Connect the power supply to the appropriate terminals, ensuring correct polarity. Next, wire the PNP type proximity sensor to the input terminals of the counter: Connect one black wire to Terminal 8, the blue wire to Terminal 10, and the other black wire to Terminal 12.

Setting Up the Digital Counter
Once wiring is complete, power up the circuit. Adjust the set value (SV) by pressing the RST button. Use the RST button to navigate between digits and the arrow keys to increase or decrease values. Press SET and Up buttons simultaneously to adjust the decimal point position, confirming changes with the SET button.
Enter the instrument's settings by pressing and holding the SET button. Navigate parameter codes displayed on the panel using the RST button. Modify parameters as needed, for instance, adjust the pulse averaging coefficient (Pc) to ensure accurate pulse correspondence. Press the RST button to begin setting. For example, let's modify this parameter to 1.0, then press SET to confirm.
Next, locate the parameter OUT 1, which represents the output control selection. Press RST to select C as the output mode, then press SET to confirm. Selecting Mode C means that when the counter detects the preset value in SV1, OUT 1 will immediately output and reset the count value to zero, starting counting from zero again. If you set TIM1, which is the output delay reset time, the counting will not stop during the specified delay time.
Parameters Settings
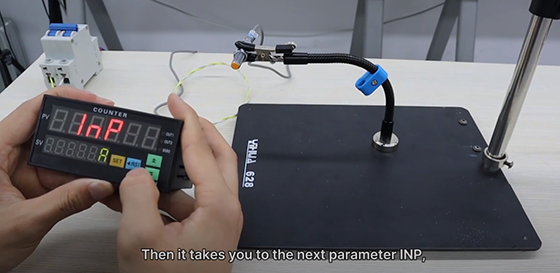
Press the RST button multiple times to navigate to TIM 1 and use the arrow keys to set the desired delay time. In our case, we select 3 seconds and confirm the setting by pressing SET. After configuring TIM 1, move on to the next parameter, INP, which allows adjustment of the count input selection. Make necessary changes and press SET to confirm and proceed.

Continue by setting dP, which determines the decimal point position on the PV display panel. Adjust CPS next, setting it to the default value of 6000 unless specific modifications are required for your application. Use the RST button to toggle dAtA, enabling or disabling data retention when there's a power-off event, based on operational requirements.
Lastly, select SIG to specify the input type for the proximity sensor & switch. Depending on your model, switch from NPN to PNP input for compatibility with the sensor. These adjustments ensure the digital counter is configured precisely for your counting applications, optimizing its performance with the proximity sensor.
Testing the Digital Counter
Once settings are finalized, long-press SET to exit parameter settings. Test the digital counter by activating the proximity switch within its sensing range. Observe as the counter accurately counts objects. When the present value matches the set value, OUT 1 will output a signal of 1 and reset the count value to zero. After 3 seconds, OUT 1 resets automatically.
This completes our step-by-step guide on using 6-digit counter meter with a proximity sensor for precise counting applications. For more information and to explore our range of industrial automation products, including digital counters and proximity switches, visit ATO.com.
If you have any further questions, you can watch the video below to learn more.

