How to Set up Latching Circuit with AC Contactor?
In modern industrial and home automation, latching circuits are essential for controlling devices effectively. By using an AC contactor, these circuits allow equipment to remain operational after the start button is pressed, until the stop button is activated. ATO industrial automation will provide a detailed guide on how to set up a simple yet effective latching circuit and conduct necessary tests to ensure its proper functioning.
Initial Wiring of the AC Contactor
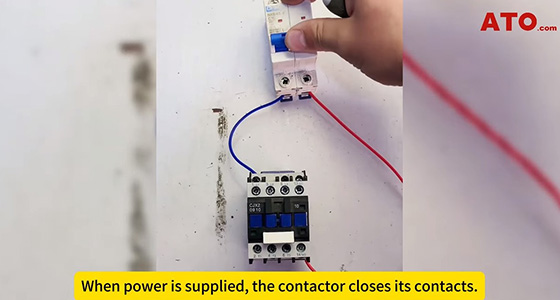
- Connect the Neutral Wire: Attach it to A1 of the AC contactor.
- Connect the Live Wire: Connect it to A2 (either end is acceptable).
- Circuit Test 1: When power is supplied, the contactor closes its contacts. Removing power will open the contacts.

Introducing Start and Stop Buttons
- Prepare the Live Wire: Cut and strip the insulation off the wires.
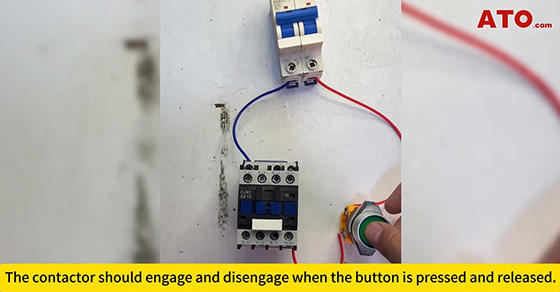
- Add a Push Button Switch: Introduce a NO start push button in the circuit.
- Circuit Test 2: Apply power and press the start button. The contactor should engage and disengage with the button.

Enabling the Self-Locking Function
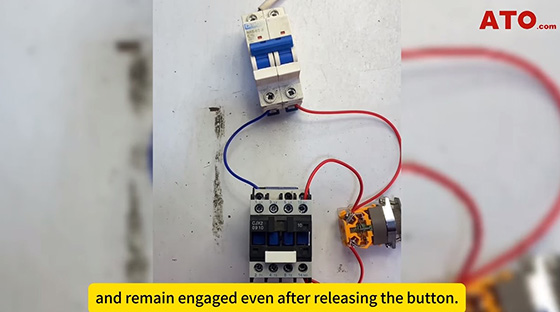
- Wire from NO Contact 13: Connect this to the NO contact of the Start Button.
- Wire from NO Contact 14: Connect this to A2 of the contactor coil.
- Circuit Test 3: Press the start button; the contactor should engage and remain so after releasing the button.

Adding a Stop Button
- Prepare the Live Wire Again: Cut and strip the insulation.
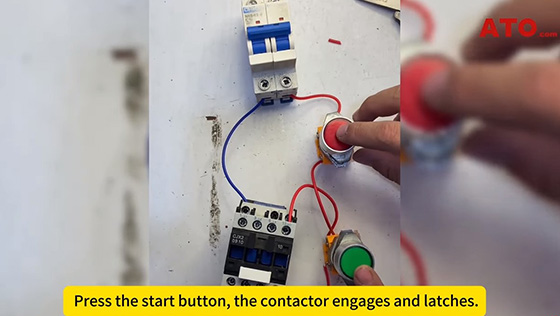
- Introduce a NC Stop Push Button: Integrate this into the circuit.
- Circuit Test 4: Apply power, press the start button, the contactor engages and latches. Press the stop button, the contactor disengages.

Motor Control with Latching Circuit
If you want to control a motor using the latching circuit, you will need to add a 3 pole circuit breaker switch.
- Step 1: Attach 3 wires (Yellow, Green & Red) to the CB.
- Step 2: Connect the other ends of the 3 wires to L1, L2 & L3 of the Contactor.
- Step 3: Connect 3 wires (Yellow, Green & Red) from the motor to T1, T2, and T3 of the contactor.
- Motor Operation: Apply power and press the start button to start the motor. Press the stop button to stop the motor.
By following the steps outlined above, we have successfully built a latching circuit using an AC contactor. This latching circuit will allow for efficient control of motors or other devices, ensuring safety and functionality in your electrical system. For more details, please refer to the video below.

