How to Install a Ball Valve?
Ball Valve Installation Instructions
Preparation before installation
- The pipelines before and after the ball valve are ready. The front and rear pipes should be coaxial, and the sealing surfaces of the two flanges should be parallel. The pipe should be able to bear the weight of the ball valve, otherwise the pipe must be properly supported.
- Purge the pipeline before and after the valve to remove the oil, welding slag and all other impurities in the pipeline.
- Check the mark of the ball valve to confirm that the ball valve is intact. Open and close the valve several times to verify that it is working properly.
- Remove the protective pieces on the connecting flanges at both ends of the ball valve.
- Check the valve hole to remove possible dirt, and then clean the valve hole. Even small particles of foreign matter between the seat and ball can damage the seat sealing surfaces.
Start to install the ball valve
- Install the valve on the pipeline. Either end of the valve can be installed on the upstream end. The handle-actuated valve can be installed anywhere on the pipeline. However, ball valves with gearboxes or pneumatic drives should be installed upright, i.e. on a horizontal pipe with the drive above the pipe.
- A gasket shall be installed between the valve flange and the pipeline flange according to the pipeline design requirements.
- The bolts on the flange should be tightened symmetrically, sequentially and evenly.
- Connect the starting line (when using a pneumatic driver).
Inspection of ball valve after installation
- Operate the driver to open and close the ball valve several times, and it should be flexible and not stagnant, confirming that it works normally.
- Check the sealing performance of the flange joint surface between the pipeline and the ball valve according to the pipeline design requirements.
Use of ball valve
The valve is only used as a switch, not for adjustment. In particular, it is not allowed to use under the conditions of exceeding the temperature, pressure limits and frequent alternating pressure conditions. Periodic tightening of bolts at high temperatures is allowed to prevent leakage and minimize thermal gradients. Shock loads and high stress concentrations are not allowed at low temperatures.
Regularly add sealing grease and soft packing to keep the equipment in good condition at all times. The valve should always be in the open or closed position and should not be used for adjustment. When it is not driven manually, the valve switch position should be consistent with the control console switch position and instructions to avoid misoperation.
Maintenance of ball valve
- The disassembly and decomposition operation can only be carried out after it is confirmed that the pressure of the upper and downstream pipelines of the ball valve has been relieved.
- Care must be taken to prevent damage to the sealing surfaces of parts, especially non-metallic parts, during disassembly and reassembly. Special tools should be used when removing the O-ring.
- The bolts on the flange must be tightened symmetrically, gradually and evenly during assembly.
- The cleaning agent should be compatible with the rubber parts, plastic parts, metal parts and working medium (such as gas) in the ball valve. When the working medium is gas, gasoline can be used to clean metal parts. Clean non-metallic parts with pure water or alcohol.
- Decomposed single parts can be cleaned by dipping. Metal parts with undecomposed non-metal parts can be scrubbed with a clean and fine silk cloth impregnated with cleaning agent (to prevent fibers from falling off and adhering to the parts). When cleaning, all grease, dirt, glue and dust adhering to the wall must be removed.
- Non-metal parts should be taken out from the cleaning agent immediately after cleaning, and should not be soaked for a long time.
- After cleaning, it needs to be assembled after the cleaning agent on the wall to be washed has evaporated (it can be wiped with a silk cloth not soaked in the cleaning agent), but it should not be left for a long time, otherwise it will rust and be polluted by dust.
- New parts also need to be cleaned before assembly.
- Lubricate with grease. Grease should be compatible with ball valve metal materials, rubber parts, plastic parts and working medium. When the working medium is gas, for example, special 221 grease can be used. Apply a thin layer of grease on the surface of the seal installation groove, a thin layer of grease on the rubber seal, and a thin layer of grease on the sealing surface and friction surface of the valve stem.
- Metal chips, fibers, grease (except those specified for use), dust, and other impurities, foreign matter, etc., should not be allowed to contaminate, adhere or stay on the surface of the parts or enter the inner cavity during assembly.
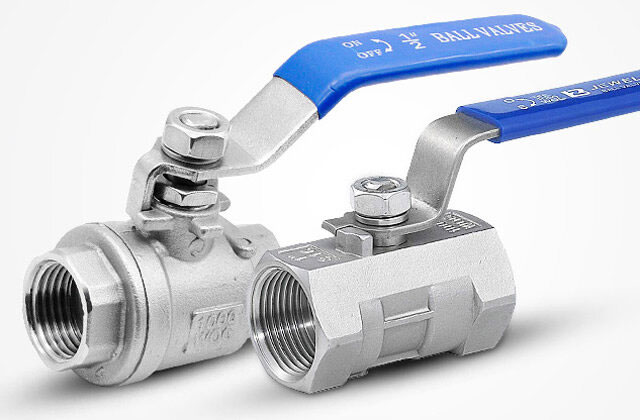
The ball valve is mainly used to cut off, distribute and change the flow direction of the medium in the pipeline. It only needs to be rotated 90 degrees and a small torque can be closed tightly. Ball valves are widely used in petroleum refining, long -distance pipelines, chemicals, papermaking, pharmaceuticals, water conservancy, electric power, municipal, steel and other industries. ATO offers one piece, two pieces, three pieces of stainless steel ball valves, sizes are available in 1", 1/4", 2" and 3".
