How to Check a Time Delay Relay?
Time delay relays play a crucial role in controlling the timing of various electrical processes. But like other electromechanical devices, time relays can become faulty as time goes on and it is vital to check a time delay relay to ensure that it is functioning correctly and maintaining the desired time delay. Now, ATO Automation will introduce you to how to check a time delay relay.
Preparation
When testing a time delay relay, make sure to disconnect the power source and unplug the device from the circuit. Let’s first do a basic visual inspection of the relay. Visually inspect the relay for any visible signs of damage, such as burnt or pitted contacts, loose connections, damaged wires, or cracks in the casing.
To effectively test a time delay relay, you’ll need the following tools and equipment:
- Multimeter: Obviously, you’ll need a multimeter to test the voltage, resistance and continuity of the relay coil and contacts.
- Power Supply: A benchtop power supply allows you to apply the rated voltage to the relay coil.
Then, we will see how to test a time relay with a multimeter.
Test The Relay’s Switching Function
Start by identifying the coil and contact terminals on the timer relay. The testing method we’re going to cover applies to both analog and digital time delay relays.
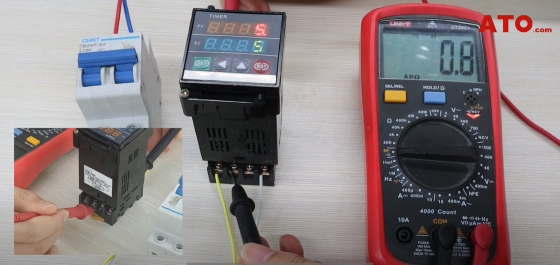
- Check Coil Resistance: Use the multimeter to measure the resistance across the relay coil. Set the multimeter to the resistance mode by switching it to read ohms in the minimum range. Place the multimeter probes on the coil terminals and record the resistance reading. Compare the measured value with the manufacturer’s specifications to ensure it falls within the specified range. A functioning relay coil typically shows a resistance reading between 50 and 200 ohms on a multimeter. A significantly different reading may indicate a faulty coil and you’ll need a new relay.
- Test the Contact Continuity: Set the multimeter to the continuity mode and check the continuity between the contacts in different switch positions. First we’ll test the de-energized condition of the relay contacts. With the relay de-energized, the COM terminal must be connected to the Normally Closed (NC) terminal and the Normally Open terminal should be open by default and have no continuity. So to test this, connect the two leads between the COM and NC terminals. If there’s no breakage, the multimeter should start the buzzer. Check the continuity between the COM and NO pins. The multimeter should make no continuity beeps and read infinite resistance if the relay contacts are okay.
- Check the energized condition of the relay contacts: Use a simple benchtop power supply to energize our relay. Verify that the relay audibly clicks, indicating coil activation. If not, it might mean that the relay has stopped working and isn’t completing the circuit. As soon as we energize the relay, the COM terminal switches and makes contact with the Normally Open terminal. Take each probe of the multimeter and touch either COM and NO switch pins. If the buzzer is activated, then the relay is well and good. If you don’t hear a beep, it means your switch pins are stuck open and the relay is faulty.

Test The Voltage
Verifying your relay’s switching function is in working order doesn’t necessarily mean your relay performs well. You’ll need to further confirm that your relay is delivering the right voltage on the switched side to eliminate the impact of corroded or bad contact points.
Set your digital multimeter to measure the AC voltage and ensure you know the supply voltage. With the relay energized, measure the voltage on the switched pin. The multimeter should read identical or close to the supply voltage, if it doesn’t, replace the relay.
Test The Accuracy of Time Delay Relay
The accuracy of timer relays is critical to the efficiency of the production process. Follow these steps to verify the timing accuracy of your time relay:
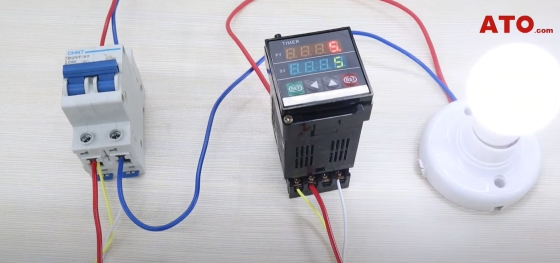
- Connect the timer relay into an appropriate test circuit which in our case consists of a power source, a push button, a stack light as the load, and necessary wiring. Make sure the connections are correct to prevent short circuits or other problems.
- Energize the relay and set a certain amount of time delay by switching the knob on the time relay.
- Upon setting, use a stopwatch or timer to monitor the timing of the switch contacts. Compare the measured delay with the specified delay time to see whether they are consistent.
- Repeat the test several times to ensure consistency and reliability of the results. This helps to rule out chance errors.

If any of the above tests fails, then you might have a faulty relay and need to upgrade or replace it. By following these steps and safety precautions, you can effectively diagnose relay issues and ensure the reliable operation of electrical systems.

