How to Calibrate Density Meter?
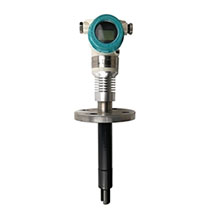
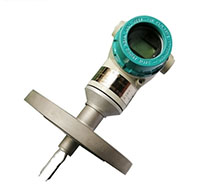
Density meters are used to measure the density of different liquids. They have a built-in digital temperature sensor. The medium temperature should be between 0 and 100°C or 0 and 150°C. They can measure different liquid contact materials. Density meters are easy to install, plug and play, digital display, and maintenance-free.
Installation Steps
The installation steps will affect the calibration of the density meter, so correctly installing the density meter can improve its accuracy.
- First, you need to confirm the size, shape and material of the pipeline and select the appropriate tuning fork density meter model.
- Before installation, the sound velocity sensor and temperature sensor need to be calibrated to room temperature. Then, install the entire device upstream of the pipeline. Make sure that the tuning fork density meter is in good contact with the measured medium and is tightly fixed on the pipeline. All interfaces must be firmly connected to avoid medium leakage.
- Connect the controller to the tuning fork density meter and ensure that the power supply and instrument communication are normal. After starting the instrument, the instrument calibration and parameter setting can be performed through the controller.
- After installation, real-time monitoring is required to ensure that the measurement results are accurate. If maintenance or calibration is required, appropriate instruments and methods must be used.
Calibration Steps
- Prepare standard solution: Select a solution with a known density as the standard sample, and ensure that the concentration and temperature of the solution are stable.
- Preheating the density meter: Place the density meter in the standard solution and let it reach the same temperature as the solution. It usually takes a while to preheat.
- Calibration operation: Insert the density meter into the standard solution and wait for a while until the reading is stable.
It is worth noting that if the density meter is used to measure density in a translucent liquid, the reading should be read at the scale data at the horizontal liquid surface position. If the density meter is used to measure density in an opaque medium, the reading should be read at the upper edge of the meniscus where the liquid and the scale stem meet, but the reading result should be appropriately corrected to the horizontal liquid surface position. To avoid such corrections, the density meter used for opaque liquids can be calibrated directly at the upper edge of the meniscus. If the density meter is calibrated in this way, the calibration method should be marked on the scale of the density meter.
Measurement error factors and Solution
Temperature: Temperature will affect the elastic modulus and other mechanical structures of the resonant element, such as changes in length and thickness.
Treatment method: Control the appropriate temperature range.
Liquid flow: Due to the friction of liquid flow, the tube wall is subjected to shear force, which will affect the change of the resonant frequency.
Treatment method:
- Reasonably adjust the operation mode of the slurry circulation pump to reduce the disturbance of the slurry to the tuning fork density meter.
- Ensure the quality of the test liquid.
Dirt pollution: If there is dirt inside, it will inevitably change the resonance period. For example, there is foreign matter or dirt on the tuning fork card of the tuning fork density meter. This phenomenon is that the data on the disk frequently fluctuates within the upper limit range and cannot be monitored.
Treatment method:
- Stop the density meter and empty it. Generally, foreign matter will be discharged with the slurry.
- Stop the density meter and flush it. The flushing pressure can also flush away foreign matter.
- The interference method, cleverly uses the tuning fork resonance principle, uses a wrench to gently tap the tuning fork density meter mounting flange, and uses the tuning fork resonance principle to often drive away foreign matter. This method does not require the shutdown of the density meter and is only suitable for very small foreign matter.
- Open the density meter and clean it.
Parameter error: Zero drift of the tuning fork density meter. This phenomenon is generally caused by the change of the density meter chip setting parameters.
Treatment method: Contact the thermal control maintenance and use the hand operator to calibrate. It is generally required to be inspected once a month.
Foam influence: The tuning fork density meter is disturbed by foam, the displayed data is falsely high, and the meter is inaccurate. Of course, some individual density meters are not affected by foam.
Treatment method:
- Modify and install an exhaust bypass pipe to bypass the accumulated foam.
- Rationally adjust the operation mode of the slurry circulation pump to reduce the disturbance of the slurry to the tuning fork density meter. In fact, it is still caused by the poor quality of the slurry.
The above possible causes and solutions for errors in the density meter have listed by ATO company. Hope it will be helpful to you.
